MS Acces to Oracle via ODBC
30 November -0001
Instructions to add an Oracel ODBC data source on Windows XP in order to create a link between Microsoft Access 2003 (or XP) and an Oracle database.
Before you begin please take note of the following gotchas:
- Note that you need Administrator rights to set up a system data source name for use.
- Make sure that you are running Windows XP Service Pack 2. This service pack includes many essential patches and bug fixes to MDAC (Microsoft Data Access Components)
- Be sure to install all the recommended updates from the Windows Update site (http://update.microsoft.com)
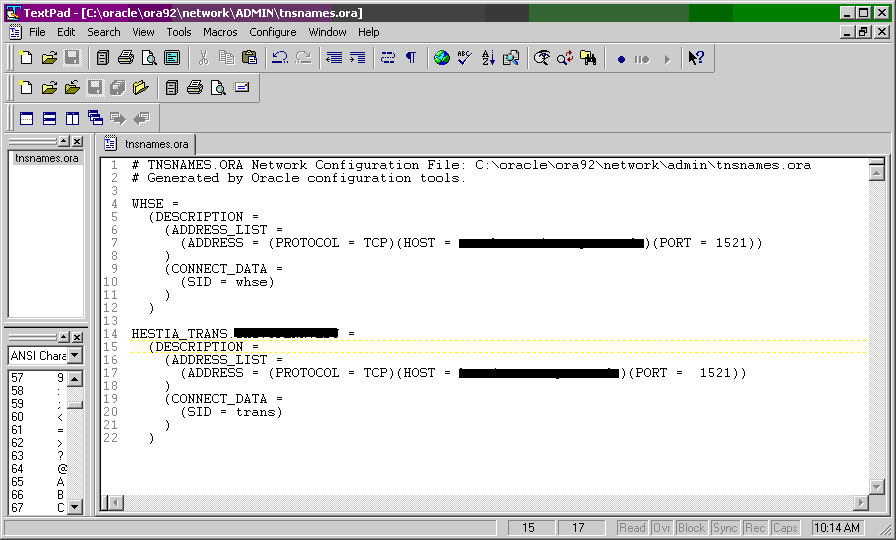
- The first step is to ensure you have a valid tnsnames file (usually located in C:\oracle\ora92\network\ADMIN). The following is a sample (used in these instructions):
- First open the ODBC Data Source Administrator (Start->Control Panel->Administrative Tools->Data Sources (ODBC).
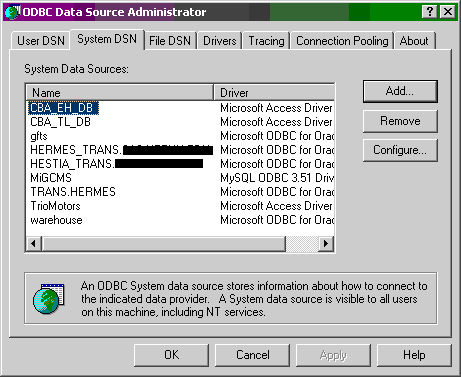
- Select the 'System DSN' tab
- Click 'Add'
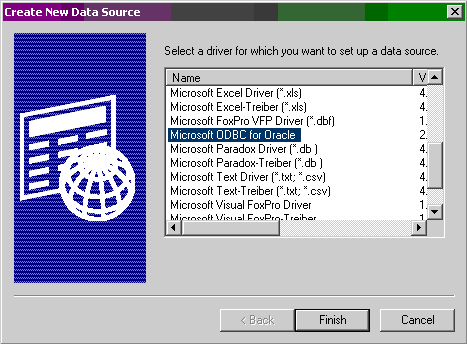
- Select 'Microsoft ODBC for Oracle
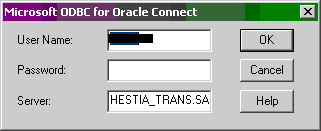
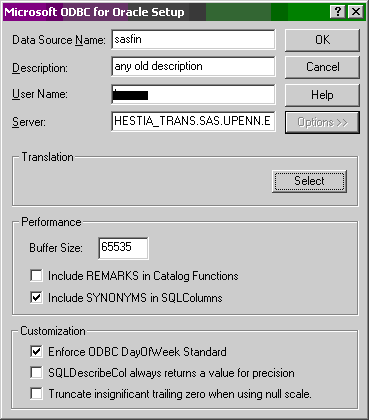
- Click 'Finish' and then fill in the resulting form. The 'Data Source Name' is an arbitrary name that will be used by Microsoft to refer to the data source. The 'Description' can be any string, the 'User Name:' must be the username used to access Oracle, the the Server: has to be exactly the same as the specification in the tnsnames.ora file (C:\oracle\ora92\network\ADMIN\tnsnames.ora).
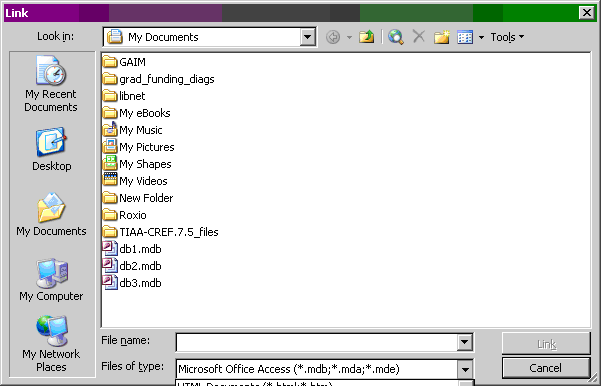
- Open Access
- In Access start a new blank database. From the 'File' menu select Import Data->Link Tables->select ODBC from the 'Files of type:' drop down in pop-up window (it's the last option).
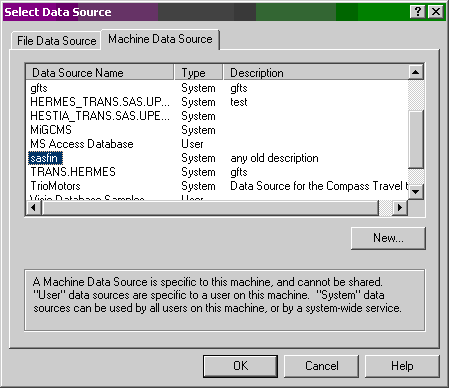
- In the new 'Select Data Source' form, select the 'Machine Data Source' Tab, then select the data source name set up in step 2d above and click 'OK'.
- This will pull up the login form. Note that the 'Server:' value should be the same as the tnsnames entry. Fill in the proper password and click 'OK'.