Using Paros for Web Application Auditing and Debugging
Paros is a wonderful free Java based tool that is invaluable for web application auditing, testing, and debugging. Although Paros is well known in the web application security circles, it is less known in general web development circles. This article will demonstrate just a few of the many uses of Paros that cross over both realms. Paros' proxy feature is invaluable for inspecting traffic as it comes to and from a browser. This allows developers and testers to investigate various aspects of web application architectures, such as how cookies are set, redirects being issued to a browser, and queries sent from the browser to the server. While Paros includes some automated scanning tools, these are rather weak and Paros really shows its strength in the hands of a skilled penetration tester who knows what to look for.
Installation
Installing Paros is relatively straightforward. As a prerequisite, the Java Run Time Environment (JRE) 1.4 or higher must be installed. The latest version of the JRE is available from http://java.sun.com. As of this writing, the latest version of Java is 6 (Java has really strange versioning systems, Java 1.2 was referred to as Java 2, but Java 1.4 is referred to as Java 1.4, and Java 6 is actually Java 1.6). This article demonstration utilized the Java SE 6 Update 7. The SE (Standard Edition) includes the Java Runtime Environment (JRE). Before installing a new version, however, check your machine to see if Java is already installed. To check simply open a command prompt and type 'java -version'. Output like the following indicates that Java is already available on the machine:
C:> java -version
java version "1.6.0_07"
Java(TM) SE Runtime Environment (build 1.6.0_07-b06)
Java HotSpot(TM) Client VM (build 10.0-b23, mixed mode, sharing)
Once Java is installed download Paros from their homepage at http://www.parosproxy.org/download.shtml. This will redirect you to the SourceForge.net host site. I chose to download the Windows exe version (paros-3.2.13-win.exe). Once the file is downloaded go ahead and install it by double clicking the 'exe'. This should bring up the Paros installer:
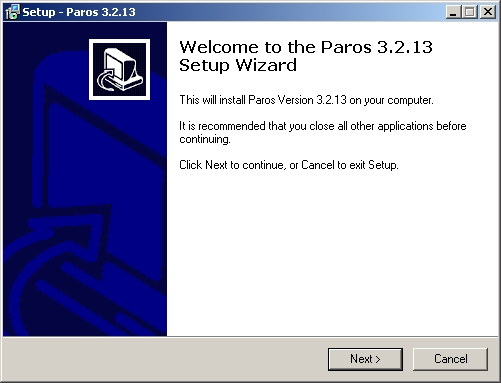
Fig 1: Paros 3.2.13 installer
To complete the installation simply click through the installer, accepting the license agreement and the default installation location. Once Paros is installed it should be ready to run it.
Running Paros
On Windows, once installed you should find Paros under Start -> Programs -> Paros. The first time you start Paros you'll be asked to accept the license agreement again:
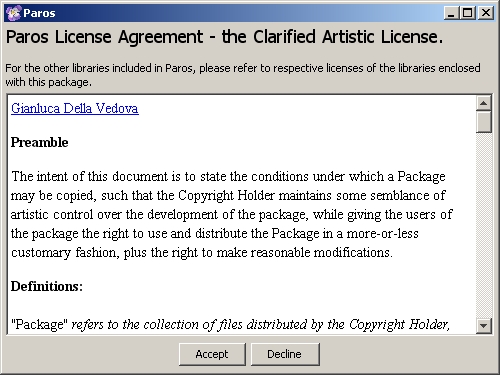
Fig 2: Paros license (again)
After accepting the agreement, Paros will start up. In some versions of Windows, it may be necessary to 'Unblock' the application when Windows prompts operators that they're trying to run an application.
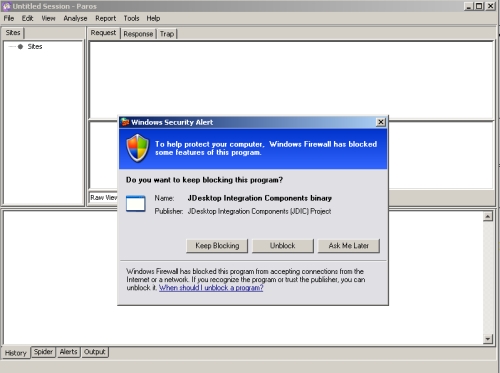
Fig 3: Windows prompting for authorization to run Paros
Once Paros is up and running it can be a little intimidating because the user interface is so devoid of details. The application doesn't present any apparent place to start. Once started, however, Paros is all ready to go. Paros works best as an assistive tool. As a proxy it really shines. To take advantage of this functionality though you first have start up Paros, then reconfigure the browser so that it uses Paros as a proxy. This reconfiguration instructing a browser to send all traffic to Paros, instead of the actual target of your browsing. Paros then handles passing requests along to the destination, as well as any responses that are sent back to the browser. While browsing Paros listens to all traffic to and from the web browser, including background traffic such as AJAX calls. For this reason it is helpful to only utilize one tab in a browser while it's configured for Paros or the interface can end up cluttered with a lot of extraneous information consisting of updates from other open tabs (with the advent of AJAX it is surprising how much is actually happening on each web page open in a browser).
Once Paros is running the next step is to set up the browser to utilize Paros as a proxy. Paros, by default, listens on port 8080 for proxy connections. This example demonstrates how to configure Firefox 3 to utilize Paros as a proxy. To do this first open the 'Tools' menu and select 'Options'. Next click on the 'Advanced' icon and select the 'Network' tab:
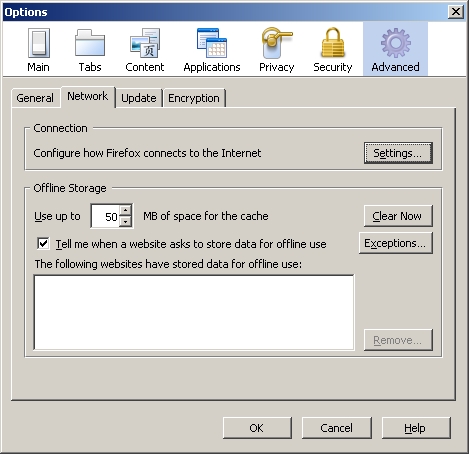
Fig 4: Configuring Firefox to utilize Paros
Next click on the 'Settings' button in the 'Connection' frame. This will bring up a new window titled 'Connection Settings'. In the new window select 'Manual proxy configuration' and set the proxy to 'localhost' on port 8080:
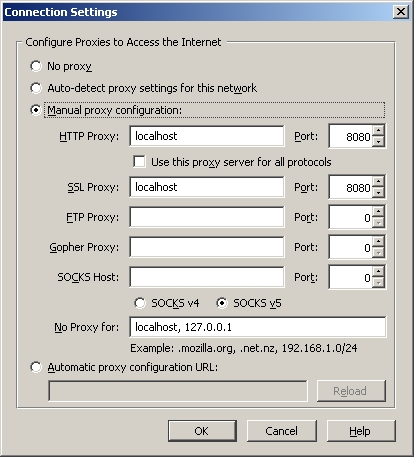
Fig 5: Configuring Firefox to proxy through Paros
Click 'OK' to close all the windows. Now notice that whenever a new website is requested Paros' blank interface will begin to fill up with information. To demonstrate try browsing to a new page. Figure 6 demonstrates browsing to the URL http://www.madirish.net/?article=220. Paros catches the page request and response, as well as the Google advertisement requests. It is possible to expand the folders under 'Sites' to look at the page request to MadIrish.net and see that Paros has even identified the images that were included in the request:
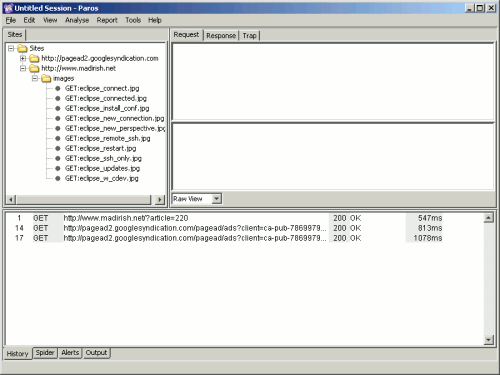
Fig 6: Paros capturing web traffic
Paros for Debugging and Testing
The remainder of this tutorial will demonstrate using Paros to examine and tinker with traffic to and from a Drupal site set up on a virtual machine. Drupal is a wonderful Content Management System written in PHP with a MySQL database back end. Using Paros we can peer at some of the HTTP traffic involved in interacting with a Drupal site, test for some data input validation, and even do some debugging.
Before starting it is important to clear any current sessions in Paros. To do this select File -> New Session and discard the current session. For this example let's assume we want to investigate a login problem rather than doing some penetration testing. Let's assume a user reports the following problem that needs to be examined: the user knows they've set their username to 'administrator' and the corresponding password to 'password' but whenever they try to log into Drupal they never get an acknowledgment that they've been authenticated. Something is wrong with the site, but what is it? Paros to the rescue. To start investigating it is necessary to start Paros, pull up the Drupal site and enter the username and password, then look through the Paros logs to see they reveal any clues as to the source of the issue.
Just looking at what Paros captures for one form submission is pretty impressive:
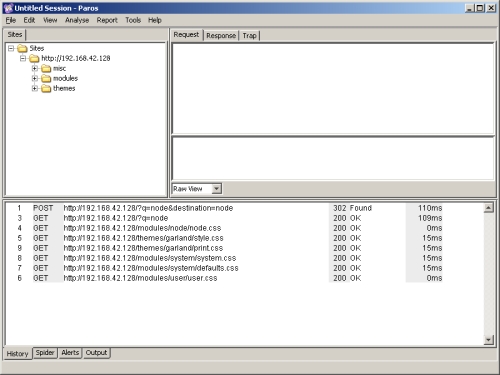
Fig 7: Paros capturing a Drupal login attempt
When clicking on the first entry in the bottom frame, the one labeled "POST", we get a much better sense of what happened when the browser posted the login form:
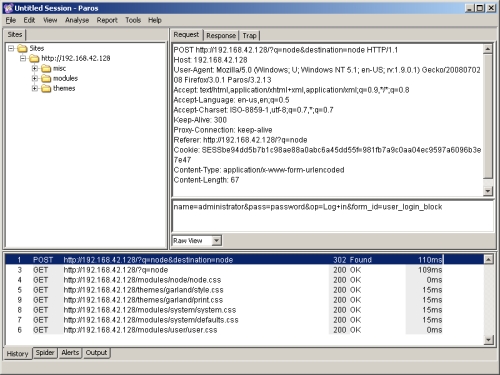
Fig 8: Paros form submission details
You can clearly see the form post, including the form variables that were submitted. Let's say we want to re-submit the form but try some other values. To do this we don't even need to leave Paros. One can simply right click the 'POST' row in the bottom frame and select 'Resend':
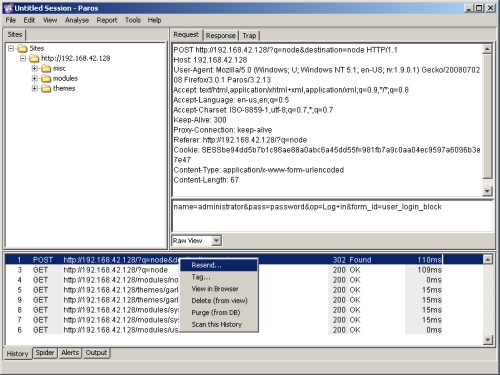
Fig 9: Paros resending a form
Selecting this option brings up a new box that summarizes all the data that is going to be sent on the form submission. The nice thing about this summary data is that it can be manipulated before we send it. Just for fun, let's try and insert some single quotes and SQL comments to see if we can accomplish a SQL injection attack. We'll change the POST URl from POST 'http://192.168.42.128/?q=node&destination=node' to 'POST http://192.168.42.128/?q=node'--&destination=node' and the value for the form 'name' field from 'administrator' to 'admin'--istrator' and see what happens. Go ahead and change these values then click the 'Send' button in the lower left corner of this window:
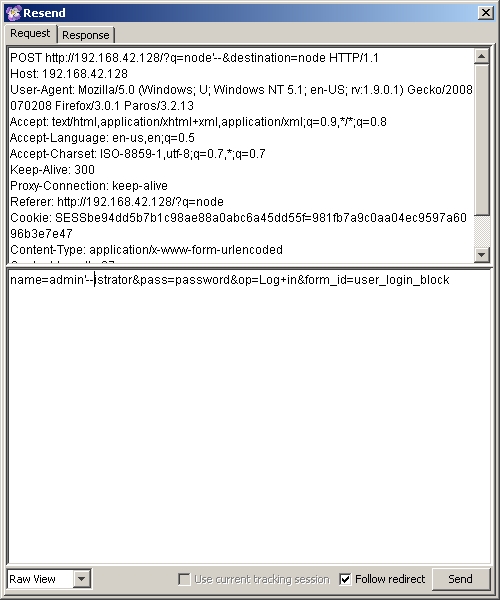
Fig 10: Paros tampering with form submission data
You'll notice that the pop up window switches over to the 'Response' tab which includes not only the header data from the form POST response, but also the HTML that you get back. In this case we get a 404 error because I messed with the destination URL:
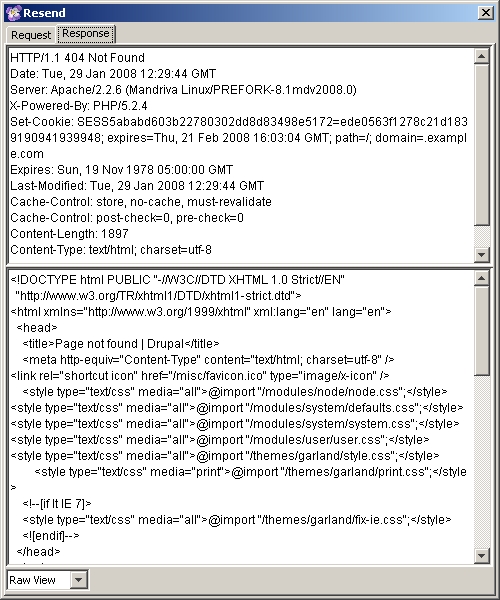
Fig 11: Paros captures the form response
While this is fun it doesn't really tell us what is wrong with the Drupal login. In order to find out the solution to this problem we have to look more carefully at the output Paros captures when you submit the login form with the proper data. If you click on the POST row in the lower pane in Paros again, then select the 'Response' tab you'll find your answer. Looking at the form post response you'll notice that the cookie that is set by Drupal is for the domain ".example.com". This is, in fact, a result of a misconfiguration in the settings.php file in the drupal/sites/default directory:
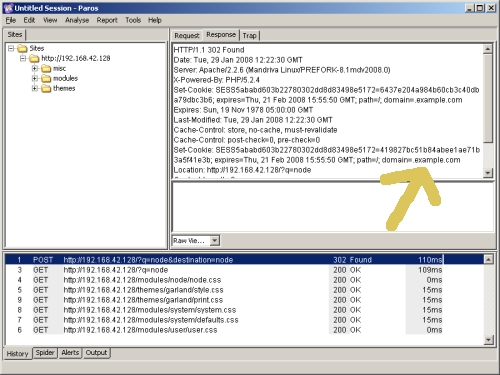
Fig 12: Examining the cookie with Paros
Using Paros we can examine cookies, form fields and other data, and modify that data on the fly and resubmit it. This is wonderful for doing things like testing for XSS or SQL injection vulnerabilities in hard to reach areas of HTTP communications like cookies or HTTP headers.
Other Functionality
Paros also has a wealth of other functionality. By right clicking a site you can select 'Spider' and have Paros crawl the entire site and examine the various URLs available from the home page. This is a wonderful way to start an evaluation because it allows you to click through a site structure and identify directories and requests via the Paros interface.
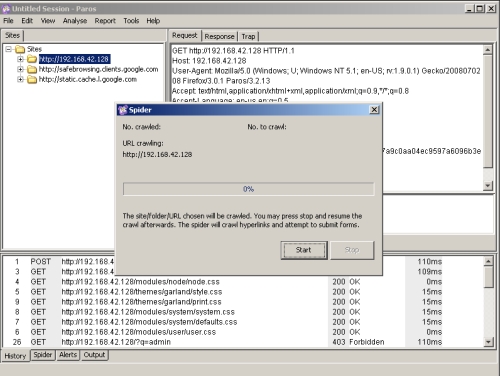
Fig 13: Paros spidering capability
Paros can also perform some basic auditing of a target website. In order to perform some testing click the 'Analyse' [sic] menu and select the 'Scan' option.
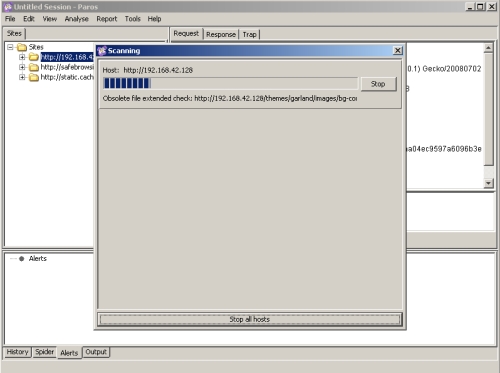
Fig 14: Paros scanning capability
Once the scan is complete you can see scan results in the 'Alerts' tab at the bottom of Paros. It has been my experience that Paros' scanning ability isn't very strong and it tends not to identify very much of interest or value, but it's nice to know it is there.
Paros can also save and reload sessions. This is a great tool if you need to do exploration at one point then later do analysis, or if you want to compare two scan sessions. Paros also allows you to save all the reports it produces for later examination or inclusion in a broader analysis report.
Conclusion
Paros is a wonderful tool and should definitely be familiar to any web application security professional. However, Paros capabilities extend beyond security and argue for it's use by web developers as well. Paros can easily mangle requests, but it also does a wonderful job of inspecting HTTP traffic and identifying problems. Paros is an excellent tool for tracking down the cause of a web server infinite redirect loop, or a cookie misconfiguration, or other elusive problem that can drive you mad if you're only armed with a web browser. Of course, the same ease with which Paros can examine and manipulate legitimate traffic allows penetration testers to use Paros to manipulate traffic in malicious ways. Paros is a great tool for blind penetration testing or developing proof of concept web application exploits.
Paros' cross platform nature also argues for its value. Learning to use Paros doesn't tie you to any particular operating system or platform. Paros can be used in conjunction with any browser, and works great along with Firefox and plugins like Tamper Data (https://addons.mozilla.org/en-US/firefox/addon/966) or web developer (https://addons.mozilla.org/en-US/firefox/addon/60). Overall I find Paros is one of those easy tools I reach for more often over time and I think it would make a valuable addition to any web developer or application testers arsenal.